Mailchimp E-commerce
The Mailchimp E-commerce plugin is a mailtrigger plugin in Centra. This means that the core functionality is to make sure proper receipt emails are being sent when an order is placed, shipped or returned. The additional benefit of using the Mailchimp E-commerce plugin is to be able to connect campaigns with sales, which allows you to track also inside Mailchimp the conversion of certain campaigns. This functionality needs some modifications to be made in the API-call to Centra in your checkout-flow on your website.
Flow
The flow works like this:
- You set up the API-key, and the settings for Mailchimp E-commerce in Centra.
- When the plugin is set up properly, Centra will install a Store in Mailchimp with the same currency as the base currency of your Centra-instance.
- Depending on the settings, triggers will be sent to Mailchimp when certain events happen in Centra, for example when order is completed, shipped or returned.
- You will be able to modify the templates being used for each transactional email in Mailchimp.
- Every product that is being added into a receipt will be added as a product in Mailchimp. However, due to the fact that a store is set to a single currency, the products we send over will not contain a price in the product catalog of Mailchimp.
- Two attributes will be added on orders in Centra. By providing the Mailchimp Campaign ID and the Mailchimp Landing Site when the
POST /paymentto Centra is made, the order will save these attributes and report them back to Mailchimp. This is the way to get information into Mailchimp what campaigns that convert the most.
Set up in Centra
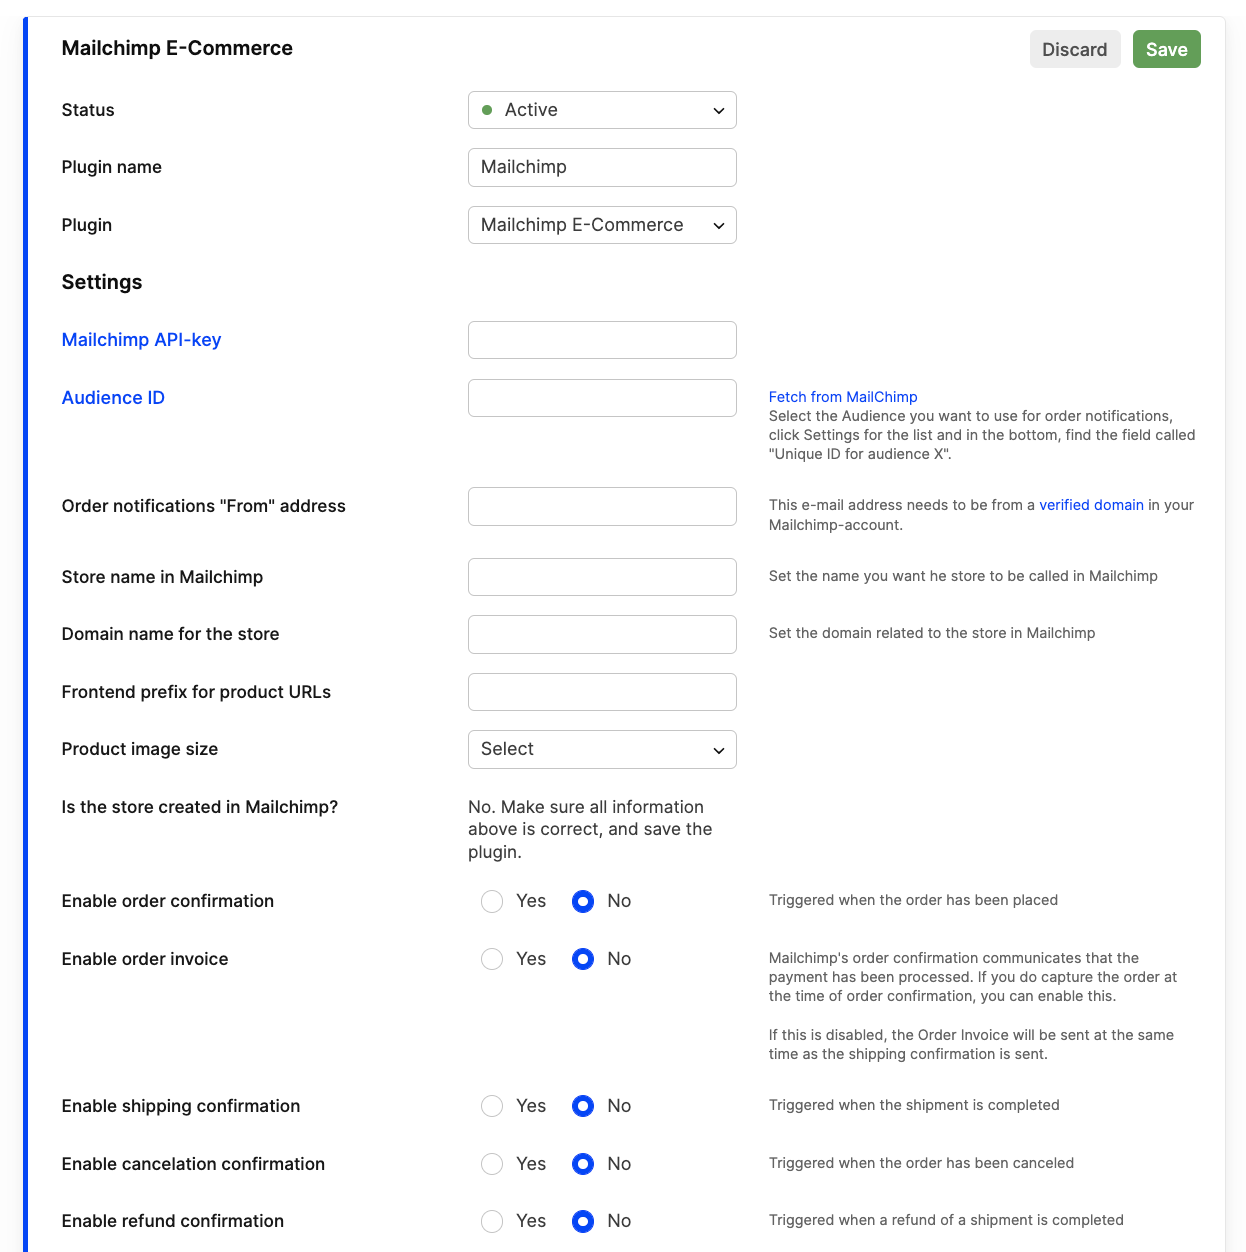
This is how the plugin looks like in Centra:
API-key
The API-key-section in the Centra plugin set up will link to the page in your Mailchimp account where you can get the API-key.
Click the "Create A Key"-button on the Mailchimp API-key page.
Copy the value into the Centra-plugin.
Audience-ID
The Audience-ID can be found by going to your Audiences in Mailchimp and then selecting "Settings" on the Audience you want to use. In the bottom of the settings-page you will see "Unique id for audience X". Copy this value into the field in the Centra plugin.
Audience Tags
Centra sends to Mailchimp these tags:
- FNAME
- LNAME
- GENDER
To be abel to use tags, make sure they are configured in your Audience settings.
"From"-address
To make sure Mailchimp will send emails using your own domain, make sure you have verified your domain with Mailchimp and then add an email address with that same domain to use as the "From"-email address for all your receipts.
Store Name / Domain Name for the store
These fields are meta-data about the store that will be created in Mailchimp. These will also be shown in the transactional emails per default (You can change this by editing the templates later on).
Frontend prefix for product URLs
Use this field if you want to prepend a URL for every product in the transactional emails. The structure for each product URL will look like this:
frontendPrefix + categoryURI + productURI
So if the "Frontend prefix" is https://ecommerce.centra.dev and the category for Shirts has a URI called shirts and the product URI is nice-shirt, the URL for the product being sent to Mailchimp will become:
https://ecommerce.centra.dev/shirts/nice-shirt
You can also specify the URL for each product when you add items to the selection, this way the URL being used in the transactional emails will follow exactly the URL you sent in when the cart was created.
To add the correct URL for the product getting added to the selection, use the productUrl-property when posting to /selection/items:
Product Image size
This is the setting for what image size you want to send over to Mailchimp for all the products. Select a proper image size that works for your product catalog.
Enable-toggling
You can now select what type of emails you want to send. Some of the emails can be completely turned off. However, you're also able to disable these emails in Mailchimp directly. Mailchimp has the last decision if the email should be sent. This basically means for example that is "Enable Order Invoice" is set as "No" in Centra, but enabled in Mailchimp, Mailchimp will actually still send the email when the order is shipped. If you do not want to send the "Order Invoice"-email at all you need to disable it in Mailchimp.
Set up in Mailchimp
When you're done editing the plugin in Centra, save it. This will trigger the installation of the plugin inside Mailchimp. After a few seconds, open up the plugin again in Centra to verify that the store was successfully created in Mailchimp:
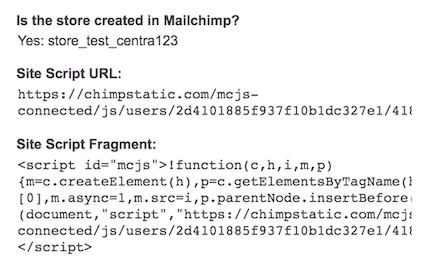
This data also contains the script you need to put on your website to connect the site with Mailchimp. After putting the snippet on your website, follow the guide on Mailchimp about connecting your site.
Now, to enable Automation in Mailchimp, go to Campaigns / All Campaigns / Automation
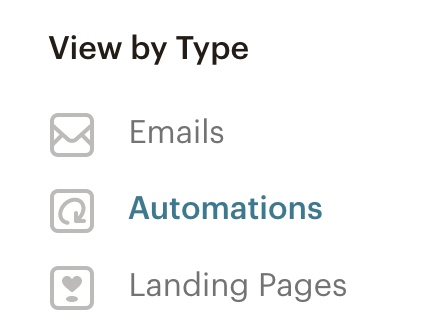
Click "Create Campaign" in the upper right corner. Select "Email" and select the "Automation"-tab and select "Enable order notifications":
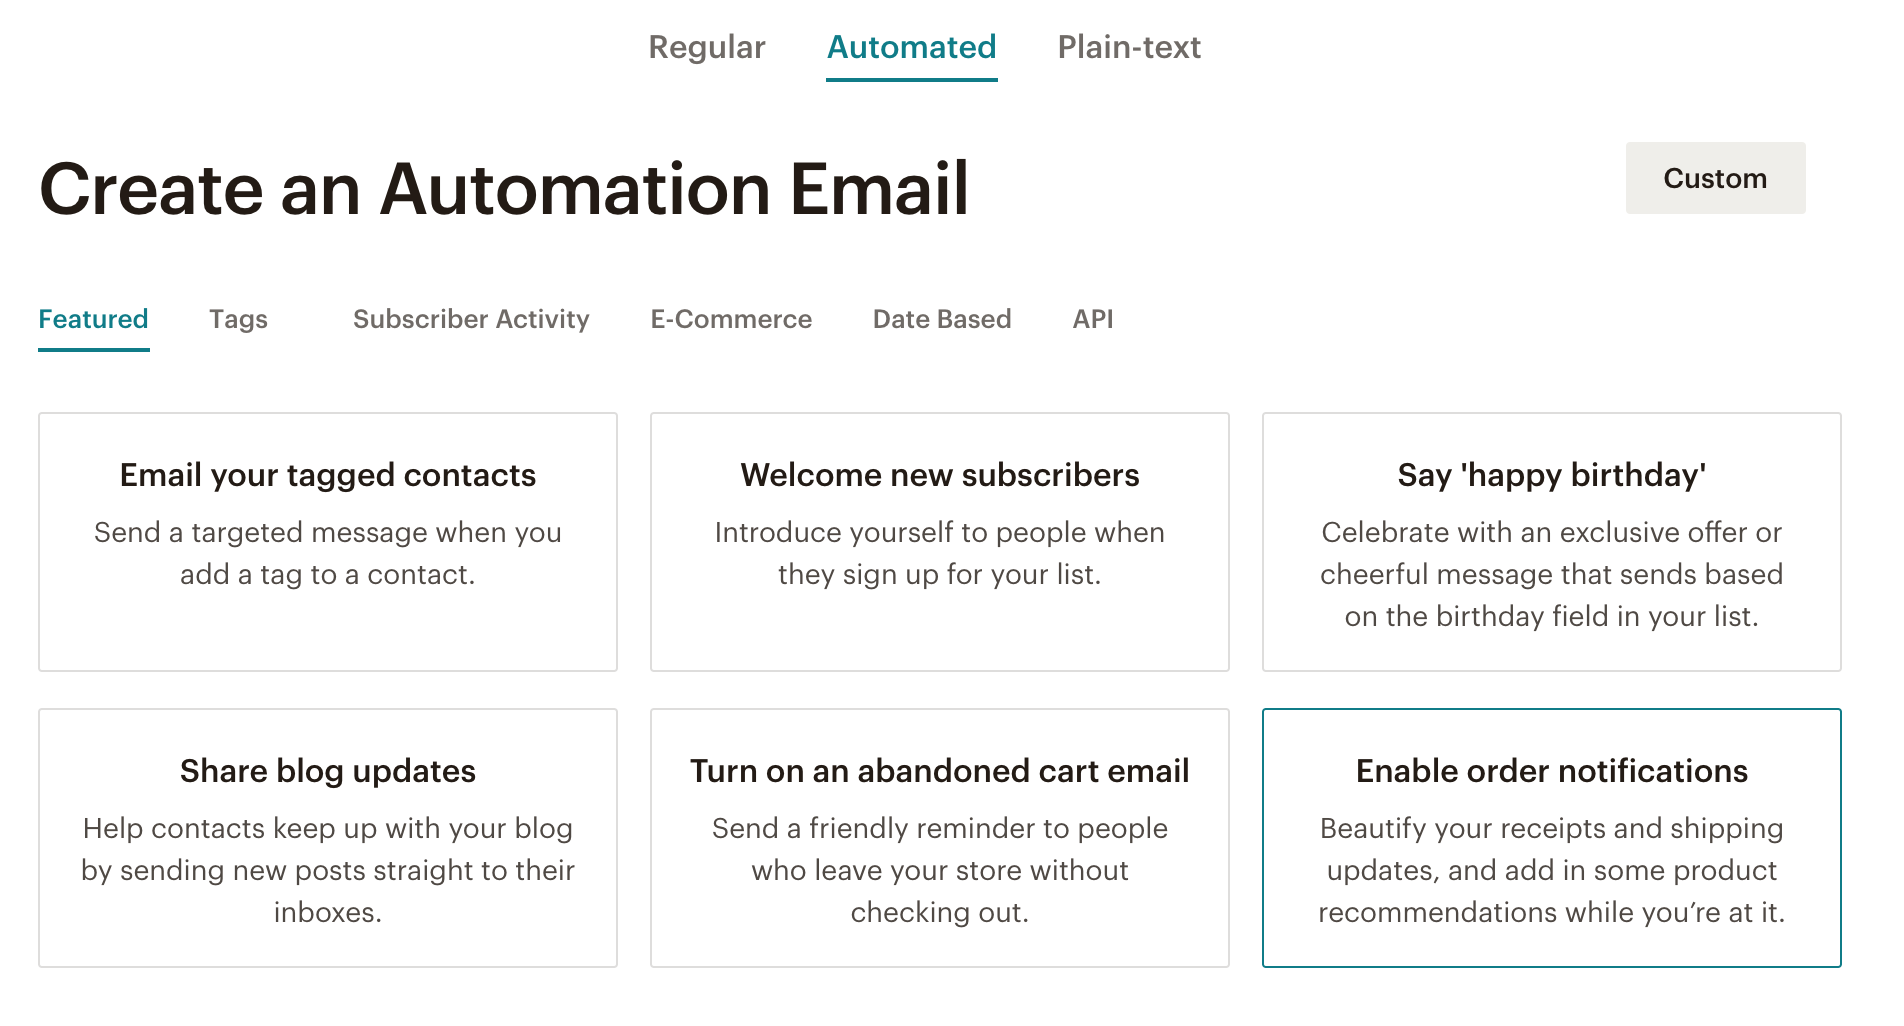
Select the store that was created by Centra (The name of the Store should be the same as you defined in "Store Name" in the Centra plugin):
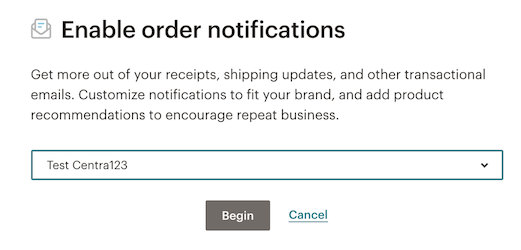
You will now be able to select what emails that should be sent from Mailchimp:
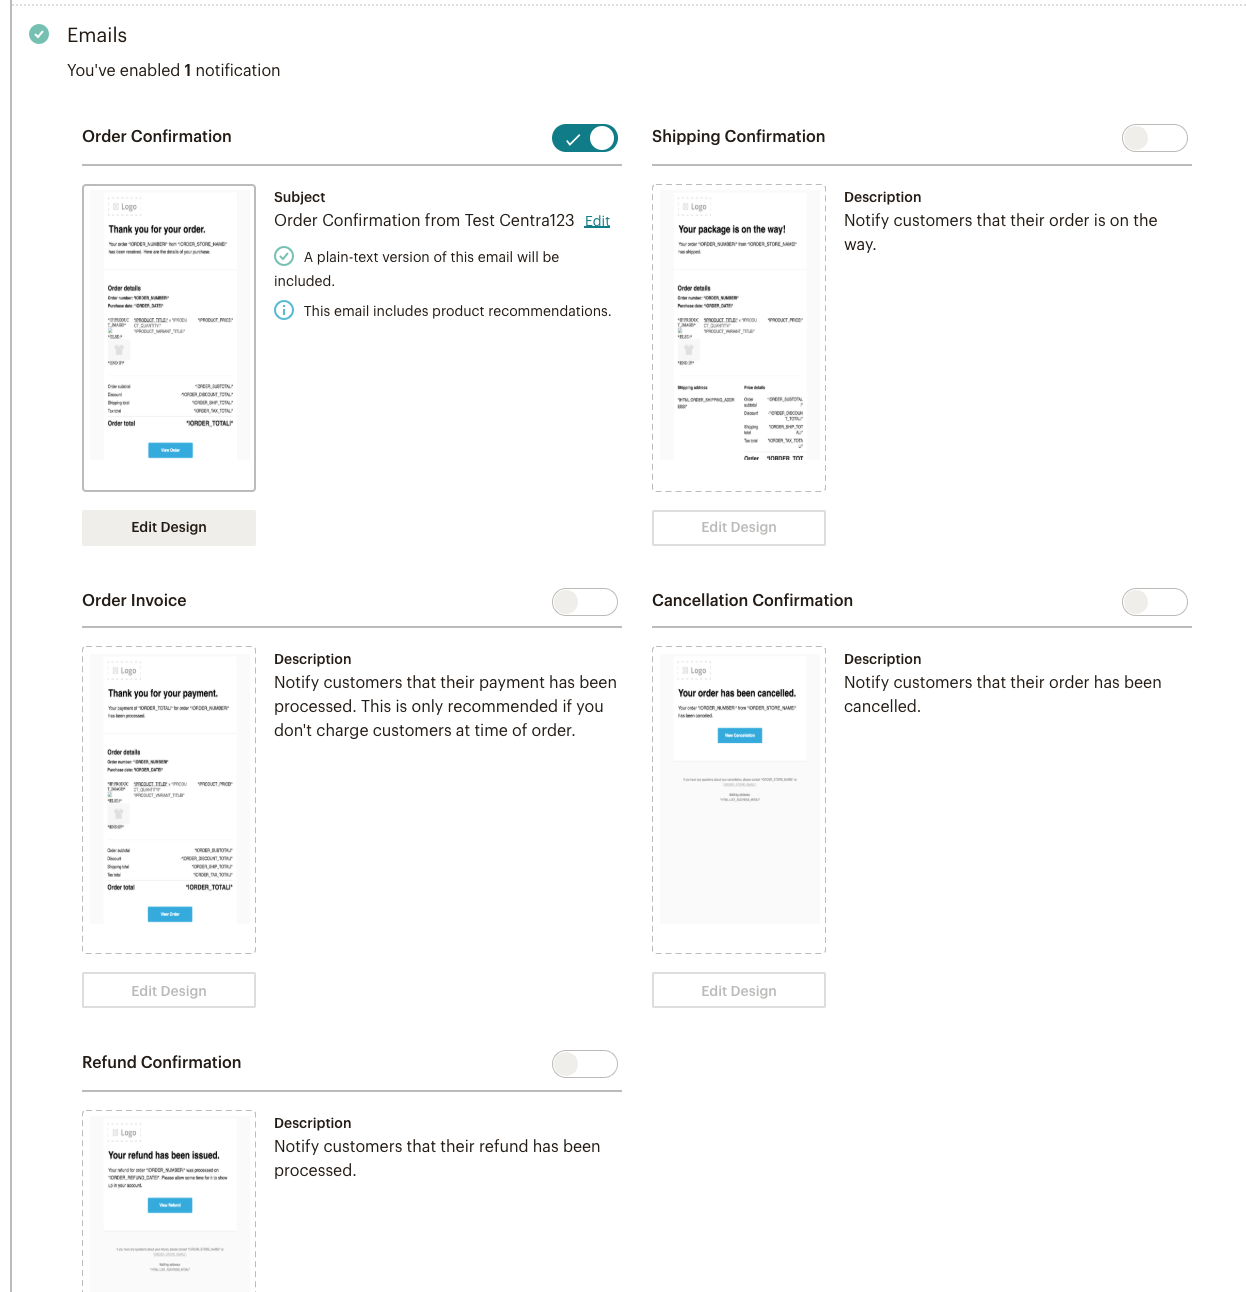
You can also edit the design on each template.
Every time you want to edit your templates, you will need to disable the automation. You must remember to re-enable the automation to make the emails trigger again after editing the design.
Product Recommendations in E-mail templates
The product recommendation-part of the Mailchimp templates will only be filled with data after 7 days or more. Therefore it is recommended that you disable this part from the designs until you know you have proper data to fill it. Also, remember that the products in Mailchimp does not have a price set, due to the single currency set up of a Mailchimp store. Due to this, you need to remove the price-section of the product recommendation since the price will be empty.
Enable automation in Mailchimp
After you are done with editing the templates in Mailchimp, click the "Start Sending" in the upper right corner. This will enable the e-mail templates you enabled to be triggered by Centra.
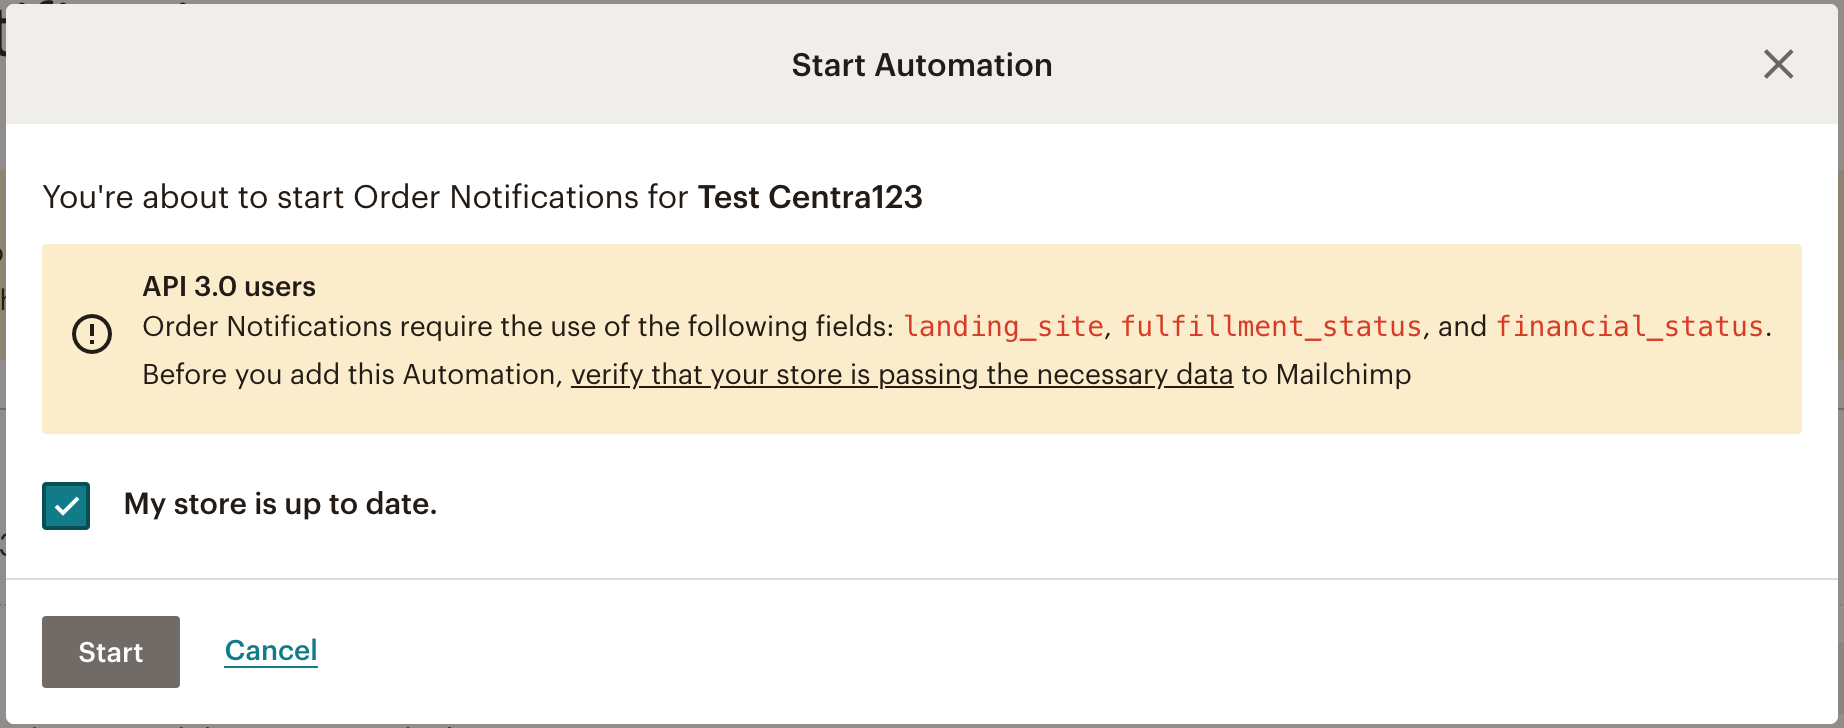
You will get a confirmation screen asking you if the store is up to date, check the box saying "My store is up to date" and click "Start":
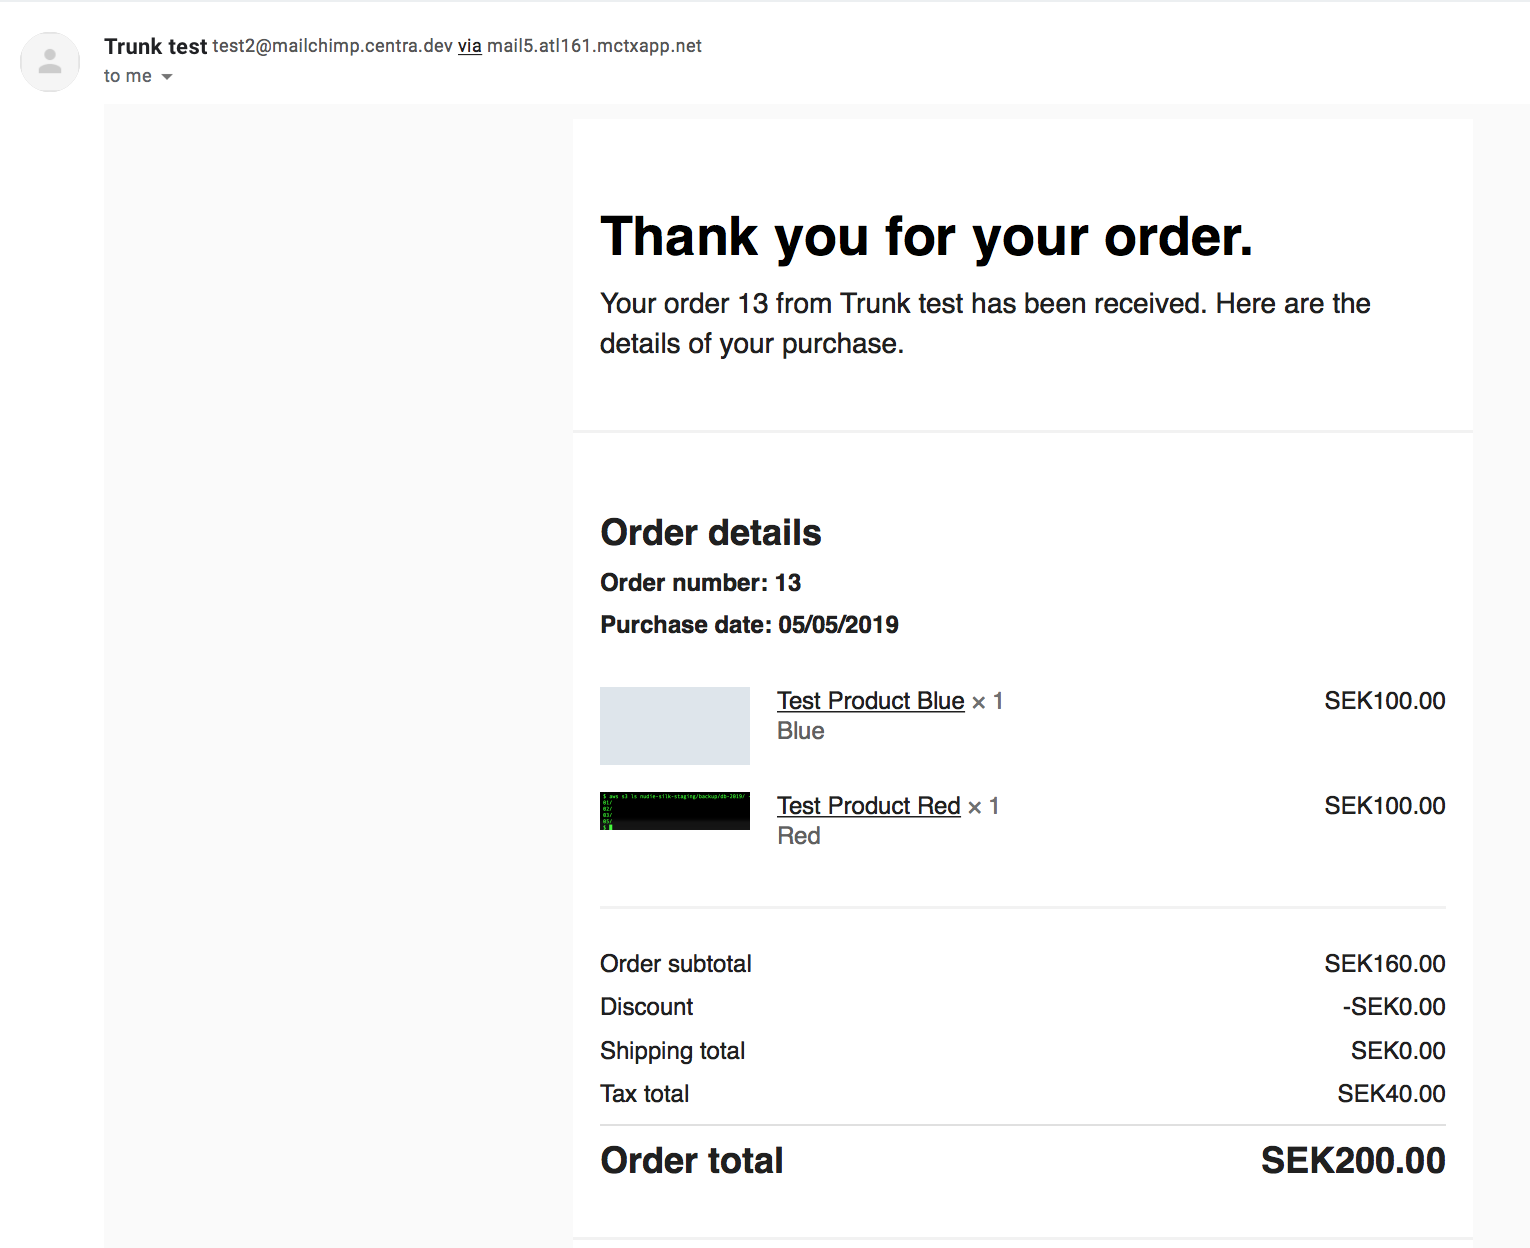
You should now be able to test your emails. Place an order in Centra, and if the Order Confirmation e-mail is enabled in the Centra-plugin and in Mailchimp, the email should be sent automatically:
You are now ready to use Mailchimp E-commerce for triggering automatic email.
Tracking conversion on Mailchimp campaigns
Now when E-commerce is enabled in Mailchimp, you're able to also track the conversion for each Mailchimp-campaign.
Whenever you add links to your website in a Mailchimp campaign, the following parameters will always get added by Mailchimp:
mc_cid=abc12345(this is just an example, this will be a unique ID for the campaign that sent the link)
You need to save this value in a cookie on your website together with the URL that was accessed when this parameter existed.
Later on, when submitting the payment information to Centra using POST /payment, the following parameters can be sent in additionalFields with the request:
mailchimp_campaign_idmailchimp_landing_site
The POST /payment could look something like this:
POST /payment
Host: client.centra.com
Content-type: application/json
Authorization: Bearer X

{
	"paymentMethod": "x",
	"paymentReturnPage": "http://example.com/success",
	"paymentFailedPage": "http://example.com/failure",
	"termsAndConditions": "true",
	"address": {
		"firstName": "Test Billing",
		"...": "..."
	},
	"shippingAddress": {
		"firstName": "Test Shipping",
		"...": "..."
	},
	"additionalFields": {
	    "mailchimp_campaign_id": "abc12345",
	    "mailchimp_landing_site": "https://ecommerce.centra.dev/nice-product"
	}
}
When these parameters are sent in when creating the shipment, the order will save these attributes:

And whenever an email is triggered, this data will be sent over to Mailchimp. You will then be able to see the conversion rate in the statistics for your campaign:

Also, in the reporting for each campaign you will be able to see all the conversions it has made:
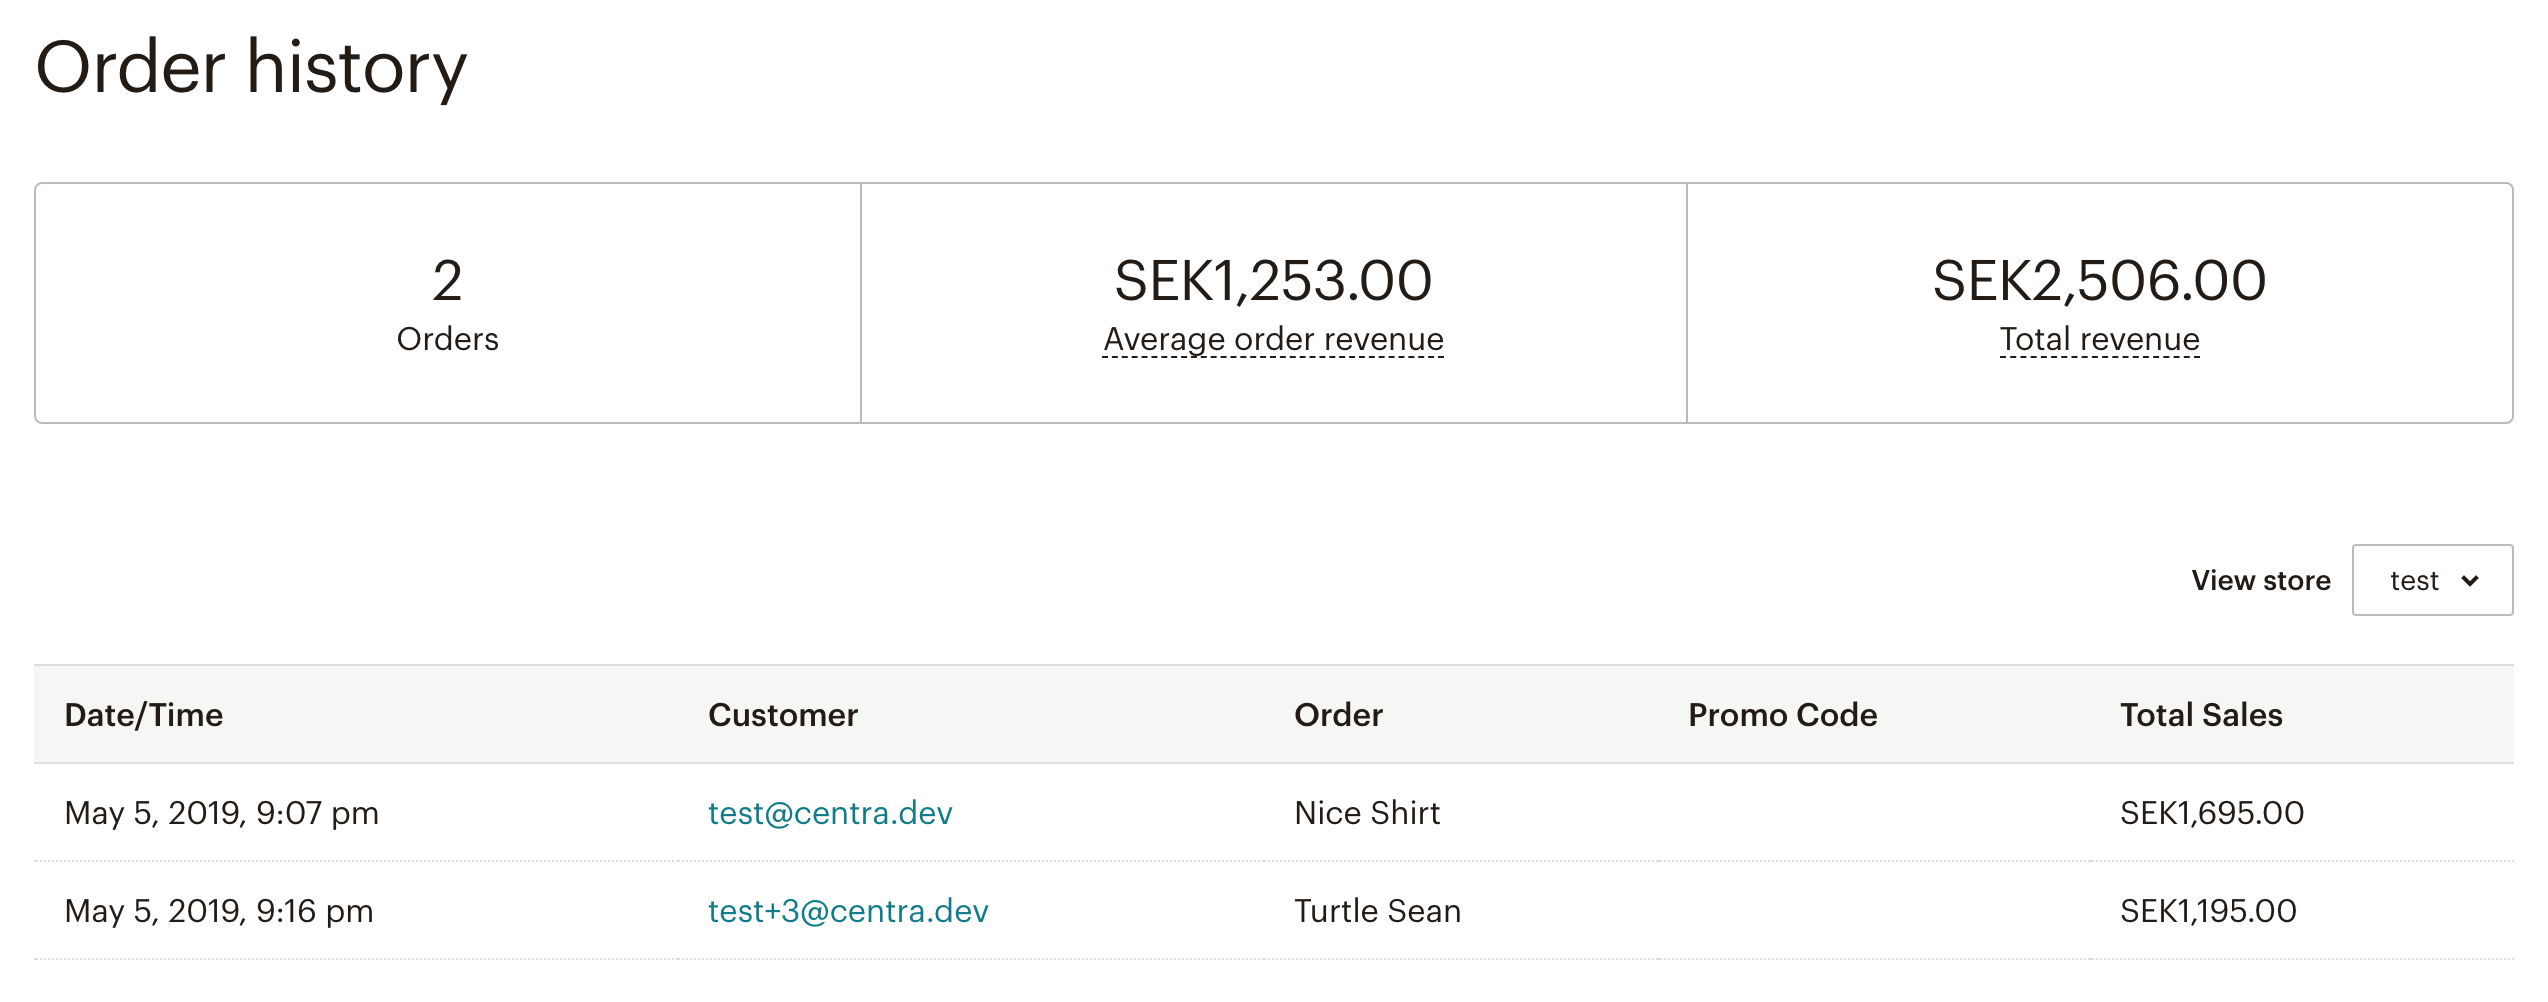
These values will be converted to your base currency, so if your base currency is EUR, the totals will be calculated into EUR even though the orders might be in different currencies.