Stripe Checkout
Last updatedThe Stripe Checkout-plugin is a hosted payment page by Stripe. It supports Credit Card payments, Apple Pay, iDeal, Cartes Bancaires, JCB, Sofort, Klarna and Giropay (only when using Direct Capture store setting). You can enable them all in your Stripe account under Settings -> Payment Methods -> select Platform: Centra.
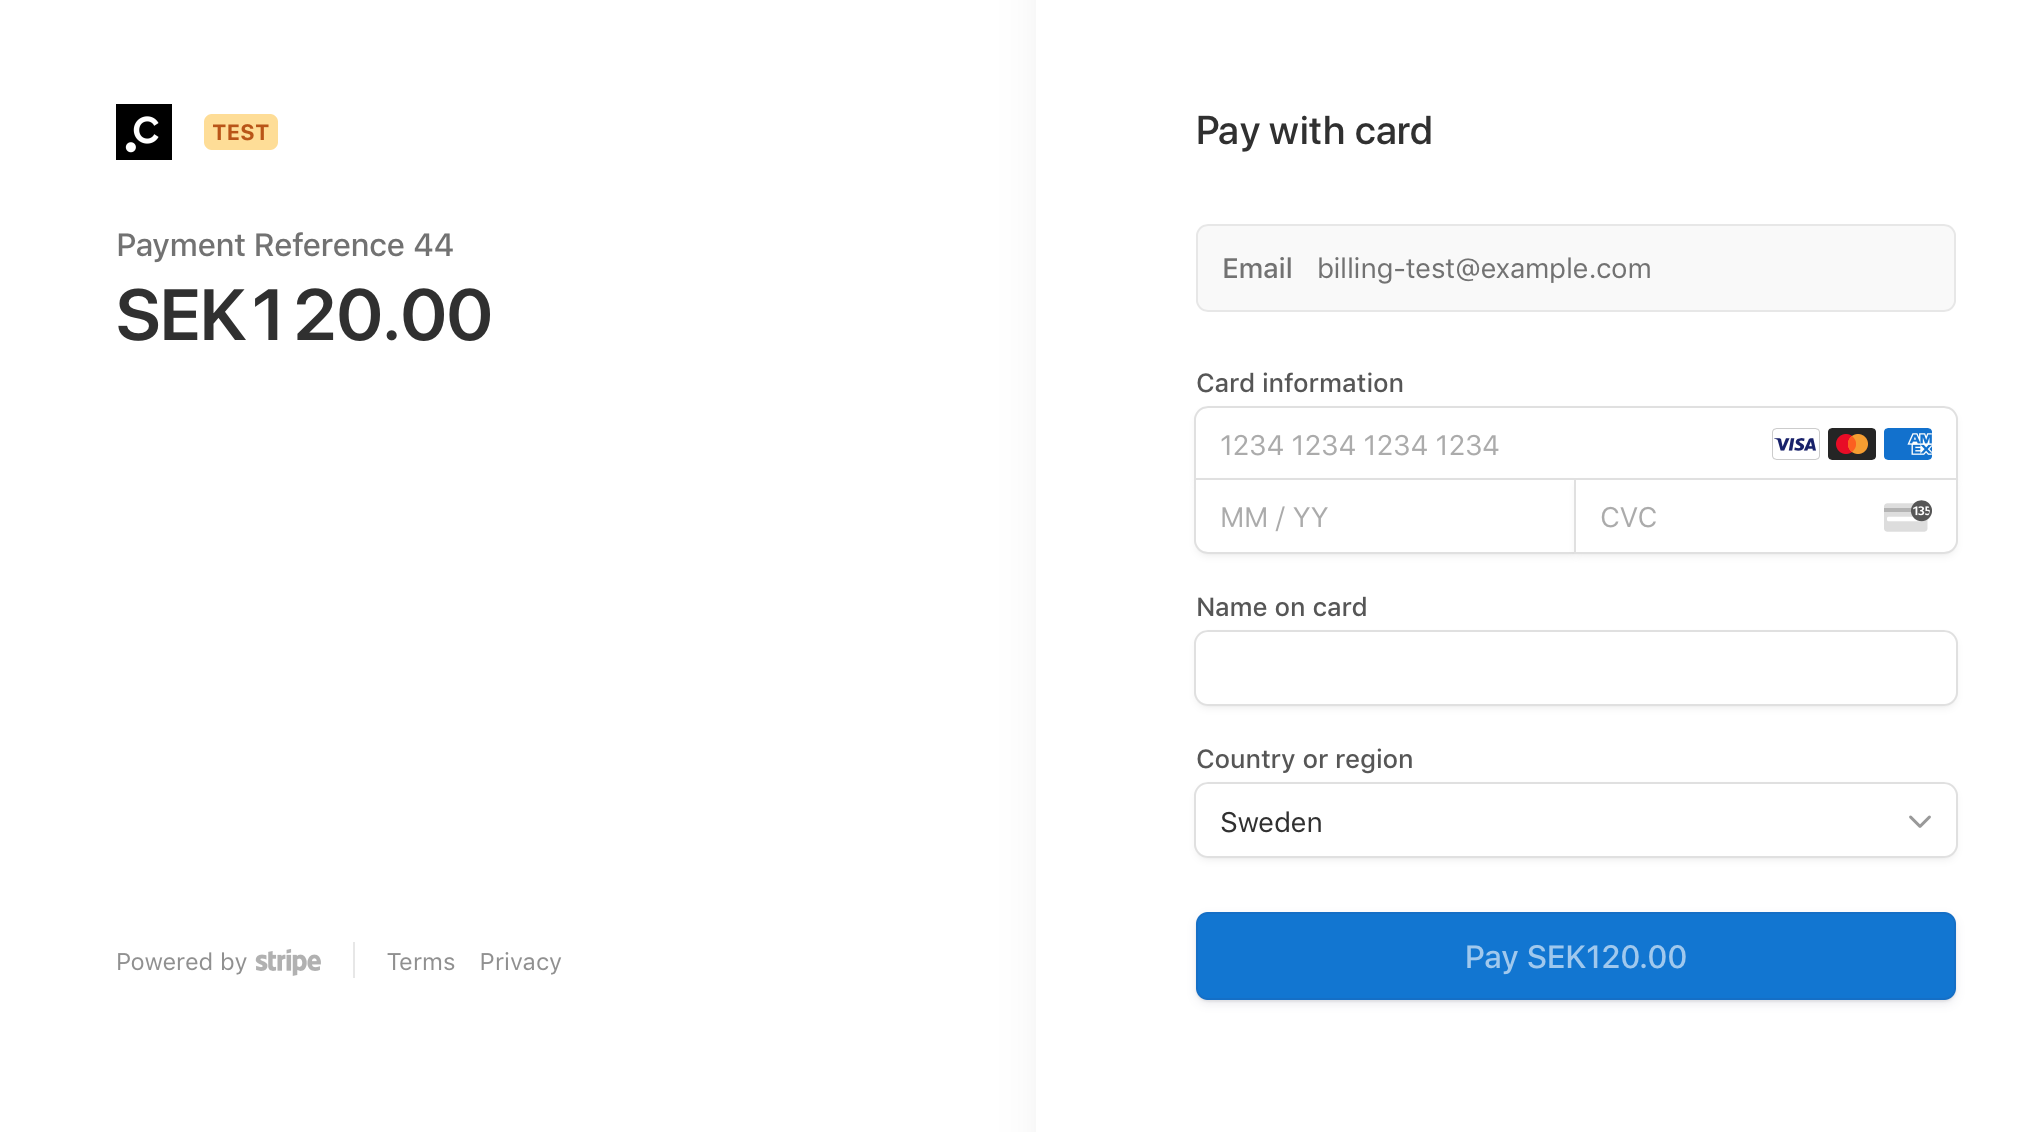
Stripe Checkout looks like this:
Flow#
The flow works like this:
- Customer fills in address information on the website.
- When the customer is done, they can select a payment option.
- If Stripe Checkout is selected (Most likely by showing the Credit Card-logos/ApplyPay or similar as the payment option) a call should be made to Centra using
POST /payment. - Centra will initiate a Stripe Checkout-session and give back a HTML-snippet together with an indication that you actually got
stripe-checkoutin the response. - The website renders the HTML.
- The HTML-snippet will trigger a redirect to Stripe's own checkout page.
- This page will support 3D-secure enabled cards, Apple Pay and all supported credit cards enabled in your Stripe account.
- Stripe will send a webhook to Centra confirming that the checkout was completed. Centra will handle this webhook and finalize the order if the webhook is saying so and that the signing secret is correct (the way we confirm that the webhook was sent by Stripe).
- The customer will after finalizing be redirected back to the
paymentReturnPageprovided in thePOST /payment-call. - The
paymentReturnPagewill then make a call toPOST /payment-result. - Centra will respond with either a success or a payment failed.
Implementation#
The implementation requires Stripe Checkout only to be initiated after address information is collected by the website itself. The reason is the new SCA (Strong Customer Authentication) ruling launching in September 2019.
This means that the POST /payment needs to happen after the address has been inserted and after products have been decided. If the customer wants to modify their information or the cart, another POST /payment must be made after this is done. The reason we cannot modify it from Centra's side whenever the cart is modified is because the session-data coming back from Stripe to launch the Stripe Checkout contains all payment information inside the session-data for launching the Stripe Checkout itself.
If the customer tries to trick the checkout, by opening another tab to modify the cart, as soon as Centra gets the server notification call from Stripe, it will mark the order as "Payment mismatch" and set the order to "Hold". This is to prevent the order from ever being fulfilled if the payment amount does not match between the order and the payment from Stripe.
Set up#
The Stripe Checkout plugin in Centra looks like this:
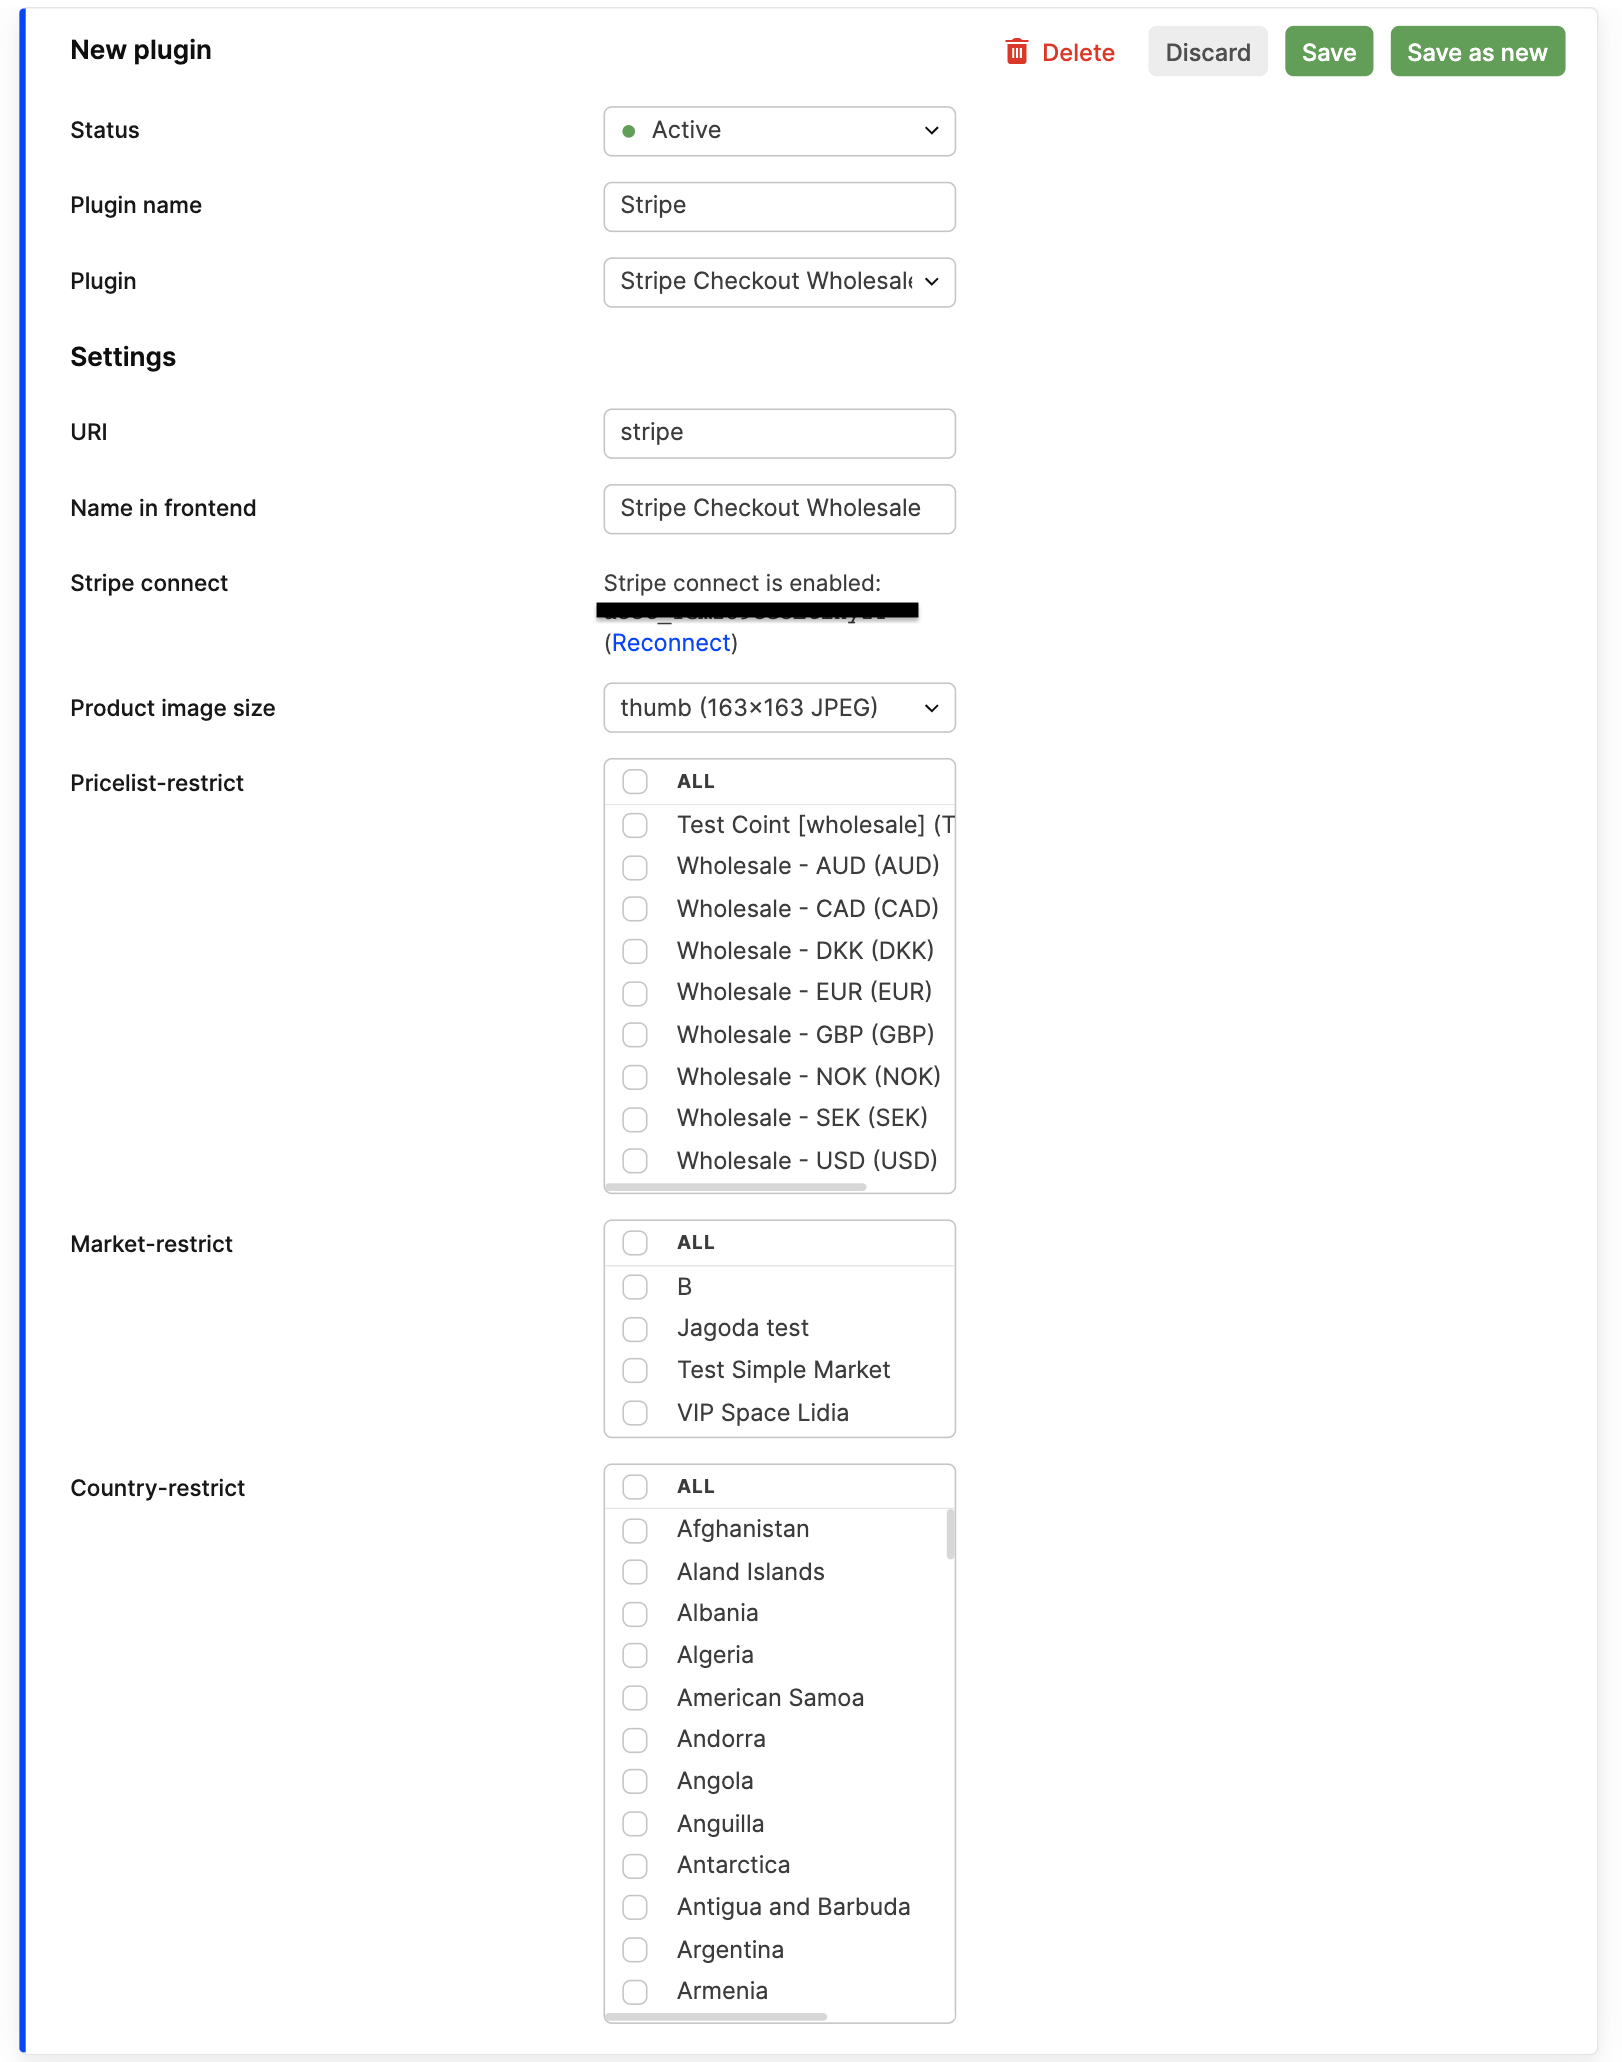
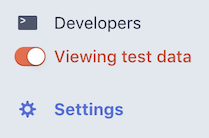
First, make sure you have created a validated business account in Stripe and that you're signed in to the Stripe Dashboard. Also make sure you're starting of by using Test Data by making sure the toggle in Stripe is set to "View test data" in the menu:
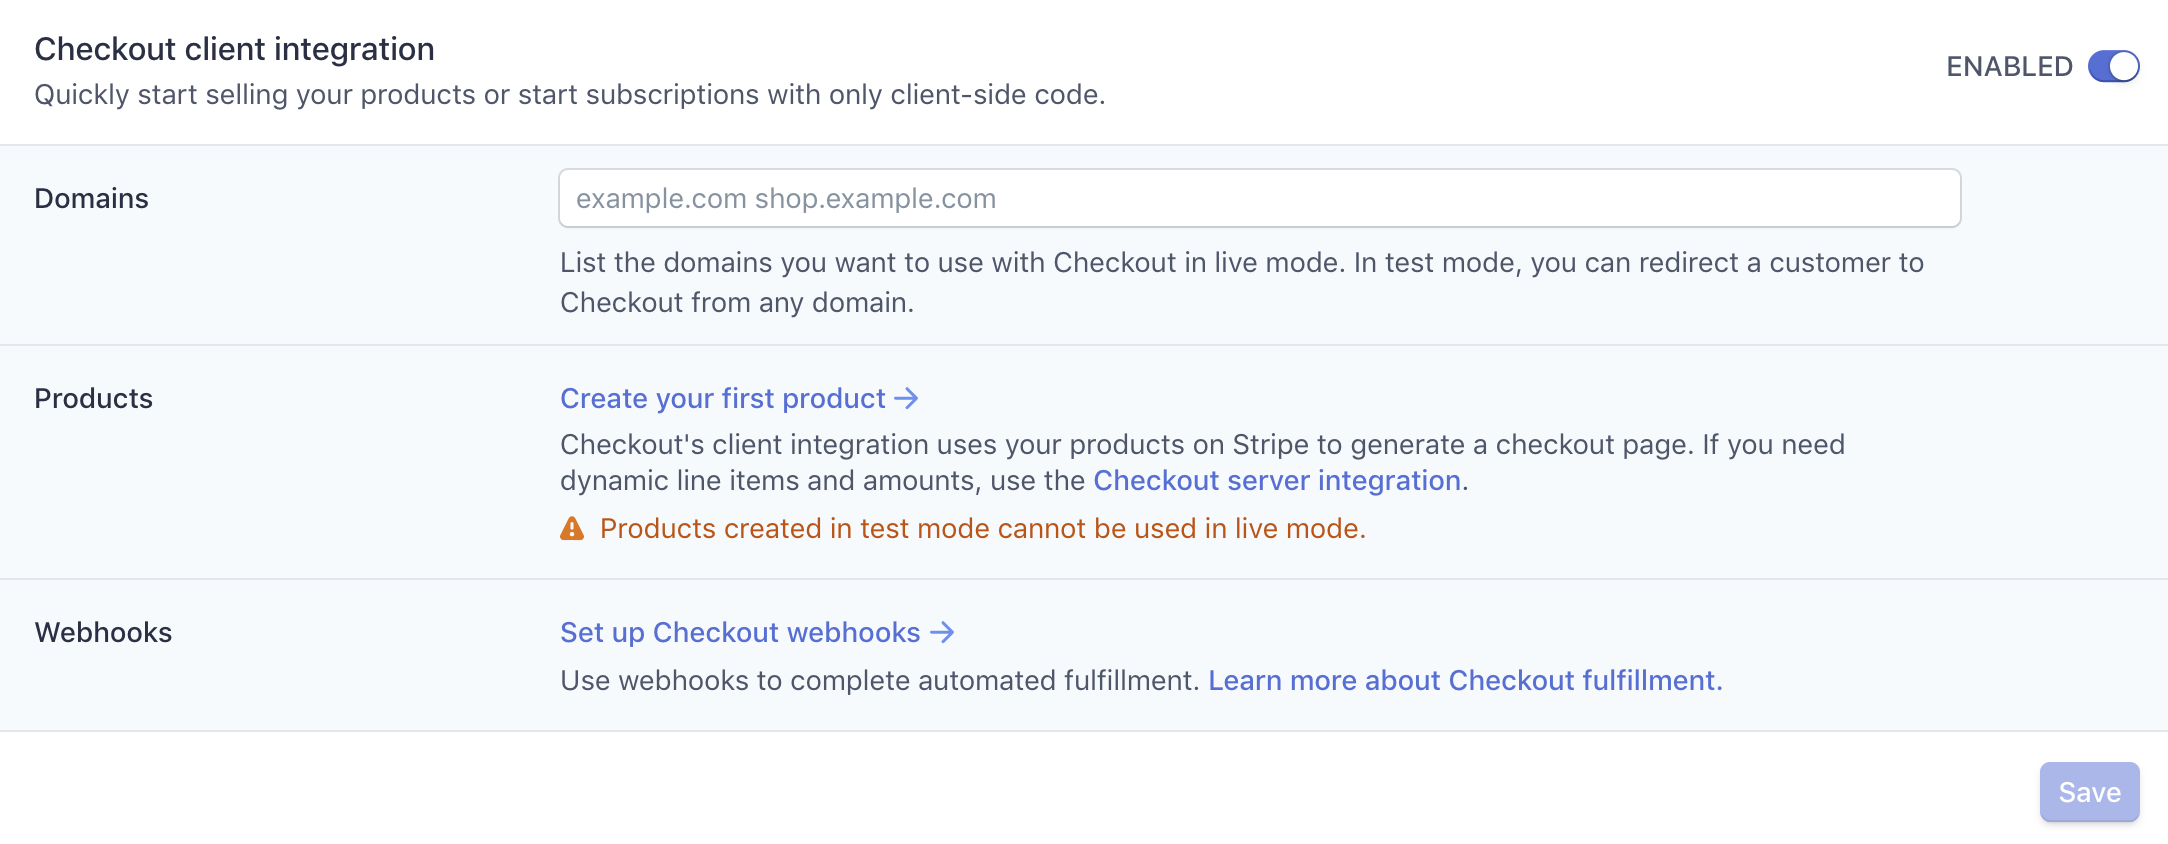
Then, go to Checkout Settings and make sure Stripe Checkout is set to "Enabled" in the top right corner:
Then, click the "Developers / API keys" in the menu. You will see two different keys. One called "Publishable key" and one called "Secret key". Centra needs both. Copy those values into the plugin inside Centra. The publishable key always begins with pk_ and the secret key always begins with sk_.

Save the Centra plugin.
Webhooks#
The Stripe-Checkout needs its own Webhook set up in Stripe. If the Webhook URL is not set up, no order will be completed when using Stripe Checkout.
To set up webhooks, open the plugin in Centra again to get the proper Webhook-URL for the plugin. You will see this section in the Centra-plugin:
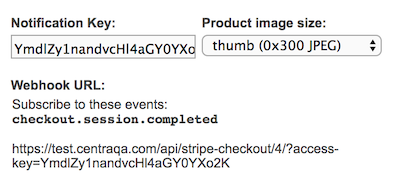
Copy the URL in this view (make sure that your QA-instance gives a centraqa.com-URL and that your live-instance gives a centra.com-URL) and go to Developers / Webhooks in Stripe for Test or Developers / Webhooks in Stripe for Live.
Click "+ Add endpoint" in the section "Endpoints receiving events from your account". In the popup, add the URL you copied from the Centra-plugin, and select the events provided from the plugin. In the case of Stripe Checkout, the only event you should subscribe to is: checkout.session.completed. It should look like this:
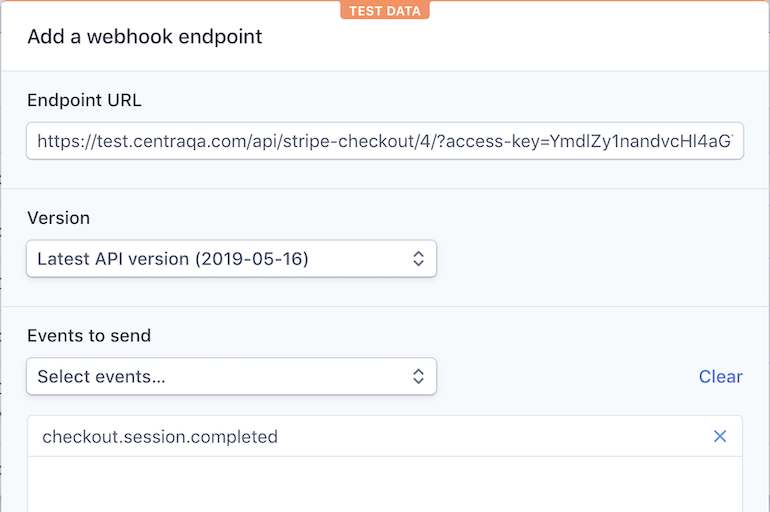
You will need to make the similar set up for Live mode to make sure the webhooks also works for Live.
Click "Add endpoint" to save it. The view you will see now is the settings of the webhook. Under the "Signing secret", reveal the value. This value is used so Centra knows the webhook-notification is coming from Stripe. Copy the value from this view:

Into the Centra-plugin under "Stripe Signing Key" (it always begins with whsec_).
You can now save the plugin. Make sure that if you used Test-Mode in Stripe, that the plugin is also set as "Test-Mode: Yes".
If you have multiple Stripe Checkout plugins for different regions or stores in Centra, but using the same Stripe Account, you only need one webhook to Centra to finalize orders in all the stores.
Going live#
When going live, these are the things that needs to be done for it to work.
First, make sure Test-mode in Stripe is off (The toggle in the left menu). Then, go to Checkout Settings
On this page, you are able to define what domains you will use for the live-mode of the Stripe Checkout. If the domains you will use are not added here, the Stripe Checkout will not work. You do not need to add your centra.com-domain, but the domain that the customer will use to purchase your products.
Make sure Stripe Checkout is "Enabled" in the top right corner. Also add the domains you know will use the Stripe Checkout in live mode in the top:

You need to set up a new webhook for the Centra-plugin you have in production, which should be set as "Test-Mode: No" to make sure we get webhooks from Stripe also in Live-mode. Follow the same description above under Webhooks.
Market/Pricelist/Country/Language restrictions
You can also restrict the Stripe Checkout to only work for specified markets, pricelists, countries or languages.
API#
The Stripe Checkout plugin will show up in the API as a payment method:
1
2
3
4
5
6
7
8
9
10
11
12
13
14
15
16
"stripe-checkout": {
    "paymentMethod": "stripe-checkout",
    "name": "Stripe Checkout",
    "useForDigitalContent": true,
    "providesCustomerAddressAfterPayment": false,
    "addressRequiredFields": [
        "email",
        "firstName",
        "lastName",
        "address1",
        "city",
        "zipCode",
        "country"
    ],
    "hasTermsAndConditionsAgreement": false
},
When you select the payment option, you make a POST /selection/payment. This step will validate that you have sent in the address information correctly. If everything is successful, the following information will be returned:
1
2
3
4
5
6
7
8
9
10
{
    "action": "form",
    "formHtml": "<script id='stripe_xrjiccsd3dxwbee7jgd...",
    "formType": "stripe-checkout",
    "formFields": {
        "sessionId": "cs_test_eiCyjbKKhib0n7Bf8ymS",
        "publishableKey": "pk_test_070RcVzmAMlxj",
        "externalScript": "https://js.stripe.com/v3/"
    }
}
You can decide here if you want either to initiate the Stripe Checkout by listening on the formType-field saying stripe-checkout and initiate your own Stripe Checkout using the formFields->externalScript defined, or render the formHtml.
The formHTML looks similar to this:
1
2
3
4
5
6
7
8
9
10
11
12
13
14
15
16
17
18
<script id="stripe_eikqvgvwkdt545" data-publishable-key="pk_test_070RcVzmAMlxjQwtgLfaYXRZ00jVrZv4Va">
function loadStripeCheckout() {
    var newScript = document.createElement('script');
    newScript.async = true;
    newScript.src = 'https://js.stripe.com/v3/';
    newScript.onload = stripeCheckoutInit;
    document.children[0].appendChild(newScript);
}
var stripe;
function stripeCheckoutInit() {
    stripe = Stripe(
    document.getElementById("stripe_eikqvgvwkdt545").attributes["data-publishable-key"].nodeValue);
    stripe.redirectToCheckout({sessionId:"cs_test_eiCyjbKKhib0n7Bf8ymS"}).then(function (result) {
        alert(result.error.message);
    });
}
loadStripeCheckout();
</script>
The form will:
- Initiate Stripe Checkout on the domain
- Redirect the user directly to the Stripe Checkout.
You need to make sure you insert the HTML into your DOM, and also make sure you evaluate the javascript from the response. One solution to do this in React is to inject the HTML into the DOM, then run the following code on it:
Insert HTML into DOM:
1
2
3
const checkoutContainer = document.getElementById('stripeCheckoutContainer'); // Reference to element already on page
checkoutContainer.innerHTML = data.formHtml;
evaluate($checkoutContainer);
Execute Javascript:
1
2
3
4
5
6
7
8
9
10
11
12
13
14
15
16
17
18
19
20
21
22
23
export const evaluate = (subtree: any, context: {} = window) => {
  function getSnippetType(script: any) {
    return script.type || '';
  }
  function getRawSnippet(script: any) {
    return script.text || script.textContent || script.innerHTML || '';
  }

  if (subtree) {
    try {
      const scripts = subtree.getElementsByTagName('script');
      const scriptsAsArray = Array.from(scripts).filter(script => getSnippetType(script) !== 'application/json');

      scriptsAsArray.forEach((script) => {
        const unescaped = getRawSnippet(script).replace(/\\/gi, '');
        eval.call(context, unescaped);
      });
    } catch (error) {
      // tslint:disable-next-line:no-console
      console.error('Catched error in evaluate function:', error);
    }
  }
};
This will make sure that:
- You do not evaluate
type=application/jsonblobs from Centra. - The proper snippet will run after the DOM has changed.
Configuration of Stripe Checkout#
There's currently not that many settings you can do on the Stripe Checkout, however, on the Checkout Settings page in Stripe there are some customization you can do related to your business information and what payment options you want to use.
Testing#
To test the flow, you first need to make sure the Test-Mode is enabled and that the credentials inside the Centra plugin are taken from Stripe when "Viewing test data" is enabled.
You will need to disable test-mode for the plugin in Centra when you run it in production.
You can then use the test-cards provided by Stripe to place test orders.